Amplifying the HarpAnyone who has every tried to boost the sound of their harp could tell you that amplifying the harp is not straightforward. This article is intended to guide you through choosing and using the best type of microphone and amplifier for your purpose. 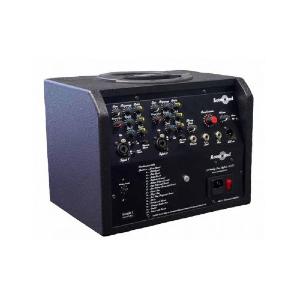
First we shall look at the art of using the microphone to get as good a sound as possible. There are three types of suitable microphone available: 1. Standard Non-Contact Microphone Mounted on a Stand2. Small Non-Contact Microphone Mounted on the Harp3. Small Contact Microphone Mounted on the Harp We shall look at each in turn.
One or more microphones are placed on stands and angled towards the harp. This is the solution most often used when recording the harp, as it allows the engineer to use high-quality specialist microphones and provides the most natural sound. It can also be used for live work, especially if you have enough time to set up the microphones correctly in advance. See the article on Recording the Harp for advice on microphone placement.
It is not necessary to fix the microphone to the harp, so there is no need to cosmetically alter the harp and no danger of damage (though see Cons section below). Likewise, this set-up is transferable between different harps. Microphones placed at some distance to the harp strings offer the most natural sound.
Not all microphones do justice to the harp and it can take a lot of experimenting to find one suitable. The best sound is achieved by using more than one microphone and this can have issues for live work: the set-up takes up a lot of room and can be restrictive on stage; several microphones pointing towards each other increase the possibility of feedback; microphones and stands everywhere can interfere with the player’s hands and vision. It is possible to use a single microphone, but this often results in an unbalanced sound as a single microphone only picks up the part of the harp it is pointing towards. Microphones placed at a distance to the harp tend to provide a low signal strength, which means the harp’s volume has to be turned up high on the PA or amp – more scope for feedback and hiss. Using microphone stands involves more equipment to carry and set up. Microphone placement is a skill in itself and often best left to a sound engineer. Watch out – drooping mic stands can fall onto a harp’s soundboard causing a lot of damage.
The best choice for recording, especially if you have a competent sound engineer to place the microphones. Not ideal for live work.
The microphone body is mounted onto the harp, but the microphone itself is not in contact with the harp so it picks up air vibrations rather than the vibrations of the instrument. This can often offer a more natural sound than a contact microphone. It usually has an adjustable swan neck which can be directed as desired. These microphones tend to be condenser type microphones which means they don’t supply their own power. Instead, power is supplied by an additional pack called a pre-amp, which also serves to boost the microphone’s signal before it is relayed to the amp or PA. Condenser microphones provide a better sound than dynamic microphones (which provide their own power and do not need a pre-amp), but the pre-amp is a mixed blessing. Both the quality of the microphone itself and the method of mounting it to the harp can be very variable. With some microphones, a neat mounting mechanism clips onto a sound hole on the back of the soundbody. These mechanisms are adjustable so will fit neatly onto any size harp and can be cleanly and safely removed. In contrast, I spoke to the manufacturer of another brand of non-contact microphone who suggested that I attach the microphone to the harp by means of a velcro pad stuck to the front the soundboard: somehow, I was unable to bring myself to attach a permanent black velcro pad to the front of my harp. As with all microphones, placement is an issue. Because this is a single microphone picking up a relatively small sound source, it is essential that it is placed correctly. Sound engineers talk of the “sweet spot” – the magic place which provides the perfect sound. Unfortunately, locating the sweet spot is generally a case of trial and error, but there are some guidelines. Generally, aim for somewhere towards the middle of the soundboard and avoid placing near the bass strings. If your mounting method involves a non-removable sticky pad, then experiment using putty first and only attach the pad once you are satisfied with the sound. Some authorities will tell you to attach the microphone to the outside of the soundboard. However, I have always found the best results to be gained from placing the microphone inside the soundbody. Some microphones are designed to point into the soundbody and smaller microphones which may be designed to be placed on the outside can also work on the inside, providing they are attached securely.
It is more difficult to list pros and cons, because this type of microphone varies: what can be a pro in one manufacturer can be a con in another. However, here are some general observations.
Small and therefore convenient to use and carry; no microphone stands on stage and no microphones in the way of hands and vision. Some microphones offer a very good sound – though some do not. The microphones themselves are totally removable (though mountings vary) and therefore are transferable between harps. Some microphones attach using a clip and can be removed so there is no cosmetic alteration or damage to the harp.
Any microphone that is mounted near to the harp will pick up and amplify the slightest knock, including those inherent in playing. It is therefore essential that the microphone is mounted securely so that there is no movement and this can be hard to achieve with this type of microphone. Cables knocks will also resound and it may be necessary to secure cables with putty or gaffer tape. Some microphones leave evidence of mounting behind and permanently deface the harp. While removable mounting has its advantages, it means you have to find the sweet spot every time you reattach. Using a pre-amp with a standard amp can cause feedback. This is not so much the case with a PA, which can often supply phantom power to the microphone, so in theory a pre-amp should not be necessary. However, the cable from the microphone to the pre-amp is invariably too short to reach the PA. This means that there is often a juggling exercise involved at the amping stage, both in terms of avoiding feedback and also in physical terms of finding somewhere to put the pre-amp without it being a nuisance.
A good quality non-contact, mounted microphone is recommended when sound quality is important, as long as you are prepared to cope with the issues surrounding mounting and using the pre-amp.
Small, round bugs or long, thin strips, these transducer microphones attach directly to the harp and pick up the harp’s vibrations. In general, they don’t offer the same natural sound quality at those that pick up air vibrations, though there are exceptions, such as the Dusty Harp Pick-Up, which provides a stunningly natural sound. Contact microphones are available in single units or in groups of two or more and can be condenser or dynamic microphones. As with the non-contact microphones, sound quality varies between manufacturers. Mounting contact microphones also involves the same trial and error to find a location with a good sound and the same positioning advice holds. However, contact microphones are flat and are therefore more capable of being securely mounted to the harp, thus reducing the problems associated with amplifying microphone movement. Contact microphones tend to be left in situ and work well placed inside the harp’s soundbody where they can mounted using double sided sticky plastic or putty, which act as an absorbing surface between the microphone and the wood. The simplest form of contact microphone is a single round pick-up, such as the high quality Schertler Basik Pick-Up Set. It is possible to use two or more single pick-ups together and on larger harps this is advisable. Other pick-ups come in pairs, such as the C-Ducer strips. The Dusty Strings Harp Pick-Up features a set of several round piezo pick-up elements secured by a central rod, which attach to the harp at various points inside the soundbody, so that the whole range of the harp is covered. These come in two sizes to fit small or large lever harps. Ideally, order your new Dusty Strings harp with the pick-up fitted, but they can be retrofitted to other harps, either at Morley Harps, or by someone with good DIY skills.
Small and convenient, contact microphones can be attached discreetly to the inside of the soundbody and forgotten until needed. It can take a while to find the “sweet spot” initially, but as contact microphones are left in situ, once you have found a good sound, its always there. Microphones can cause feedback when facing each other. As there is no possibility of contact microphones facing towards each other, it is safe to use several together. Some contact microphones do not need pre-amps which means they are easier to use at the amplifier stage.
Contact microphones need to be securely mounted and are therefore left in situ, so it is necessary to have one set per harp. Sound quality is less natural with some manufacturers – though some are very high quality indeed.
A good, convenient choice for live work, especially if you choose a good quality microphone. Pre-Amp, Amplifier and PA If needed, pre-amps are supplied with the microphone, so, for once, life is relatively simple. Until you use one with an amplifier, that is. Be careful, because the signal is effectively being boosted twice and this is a recipe for feedback. Set the pre-amp volume to 3/4, then start off with the amp volume low and increase very gradually. For small bookings such as boosting background music, an amplifier (designed for guitar or keyboard) should be satisfactory. Many amps are merely designed to pick up an electronic signal and boost it. To amplify the harp, you need an amp which can cope with reproducing acoustic signals: these are known as acoustic amplifiers. Amps are small, easy to transport and set-up and are therefore a good option, although some sound quality will be lost. The Schertler David Acoustic Amplifier is a high-end acoustic amplifier recommended for the harp. We also recommend the Accusound AC-AMA-1 Acoustic Amplifier. For those looking for a mid-budget option, the Marshall AS50R / AS50D is good choice. I have used this amp for several years and have found it to be reliable and copes well with the wide pitch range of the pedal harp. For concerts and larger bookings, you may need a full PA. Most PAs are designed to reproduce vocals so can cope with faithfully reproducing an acoustic signal. They are also capable of handling a wide frequency spectrum as well, so you will probably find that you get a better sound from a PA than a guitar amp. On the other hand, they are large, expensive and cumbersome and often, just moving the harp around is enough of a task in itself, without having to set up a PA as well. Finally, for a larger harp, especially a pedal harp, you will probably need to reduce the bass EQ. I set my Bass pan to quarter to and my treble to quarter past and that seems to work well. If your amp/PA has a reverb facility – turn it off! |
